A VPN is perfect for those of you us who need access to our home networks while away. I’ve tried cloud hosting my VPN server, but soon realized this would only work if I kept my home network constantly connected to the VPN. Not to mention it cost me $5 bucks a month. Ultimately, I decided to host my own WireGuard VPN server in a Windows 10 virtual machine that I already had.
I won’t go into details about how to set everything up because I found a great, short video that does that job for me.
What I will mention is a couple of things that the video does not address that took me awhile to figure out. At 4:25 in the video, the author discusses sharing your connection between your network interface and the WireGuard interface. This is necessary if you want to be able to access not only resources on your local network, but also if you want to access the internet through your client VPN.
If you follow the steps in this video you will have a working VPN – until you restart the VPN server. You’ll find out that you can still connect to the server, but you can’t access network resources or the internet (even though you are still sharing the interface). Here’s what I found: the service responsible for sharing the connection must be set to automatically start.
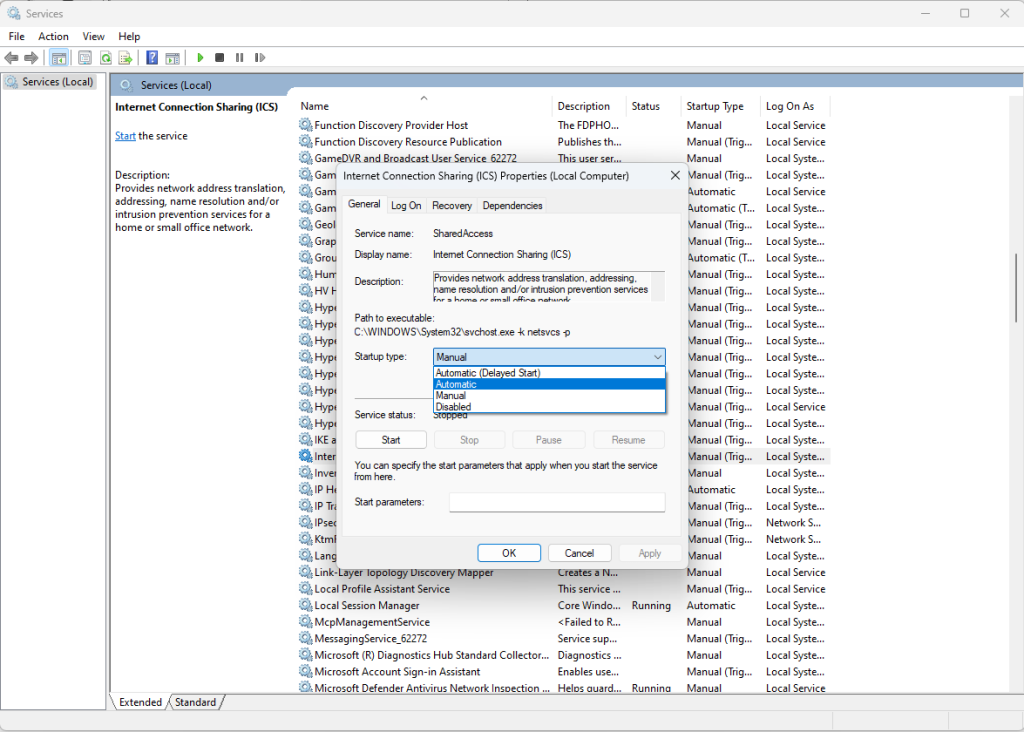
Go to Start -> Run -> service.msc
Find Internet Connection Sharing (ICS), right click, and select Properties.

Set Startup type to Automatic. Now, every time you activate your WireGuard server, the WireGuard interface will be able to access network resources on your local network interface.
The final tip I have is something that bothered me personally because I don’t login to my Windows machine with an administrator account. The WireGuard GUI will only open in an account with administrator privileges. At first, I would switch accounts, connect to the VPN, and then return to my local account, but I quickly got tired of this. Here’s what I found out after a little research:
Open an elevated Powershell prompt and enter the following command to connect to your VPN from a standard account:
wireguard /installtunnelservice "C:\Program Files\WireGuard\Data\Configurations\wg_client.conf.dpapi"And enter the following command to disconnect from your VPN:
wireguard /uninstalltunnelservice wg_clientAnd that’s it! Now you have a free, self-hosted VPN server!
Update 8/23/24
I ended running into issues on restart where I could not get out to the internet when I connected to the VPN. My solution was to write a simple script that disables and enables the Internet Connection Sharing service and scheduled it to run at every log in.
Here’s the .ps1 file.
One important note: In order to run that script you will need elevated privileges. In other words, you can only run that script as an admin. So before we can run the commands that restart ICS we must open an elevated prompt. To do that we will register one more script with Task Scheduler. This script will prompt the user for elevated privileges and subsequently run the script to restart ICS.